
If you are looking for some ideas on how to decorate your butter cream cake,
or on top of cupcakes .. this will be one of many goods ideas.
It's easy. It's quick. It's fun! and most of all, It's beautiful! ^_^
Source: Here is where i learn from. Great blog, lovely pics and clear explanation!
Thank you so much for sharing.
Source: Here is where i learn from. Great blog, lovely pics and clear explanation!
Thank you so much for sharing.
Prepare time: about 1 minute per butterfly .. if no kids around! ;)
Waiting time: an hour or so at room temperature (depend on the country and season: quick in winter and forever in summer :D) or 15 minutes (everywhere in the world) in the fridge!
Ingredients
- semi sweet (or dark) chocolate chips, melted (for an outline)
- white chocolate chips, melted (for the filling)
- gel food coloring (to be mixed in white chocolate)
- Sprinkle (optional)
- zip lock bags
- paper and parchment paper
Prepare:
Melt chocolate in a bowl. Then transfer into one corner of zip lock bag. Close zip. Cut off one corner, about 1 mm large (begin from tiny cut and test as you go to see which size seem right to you)
*For a colored chocolate, simply add in gel food coloring after white chocolate is well melted.
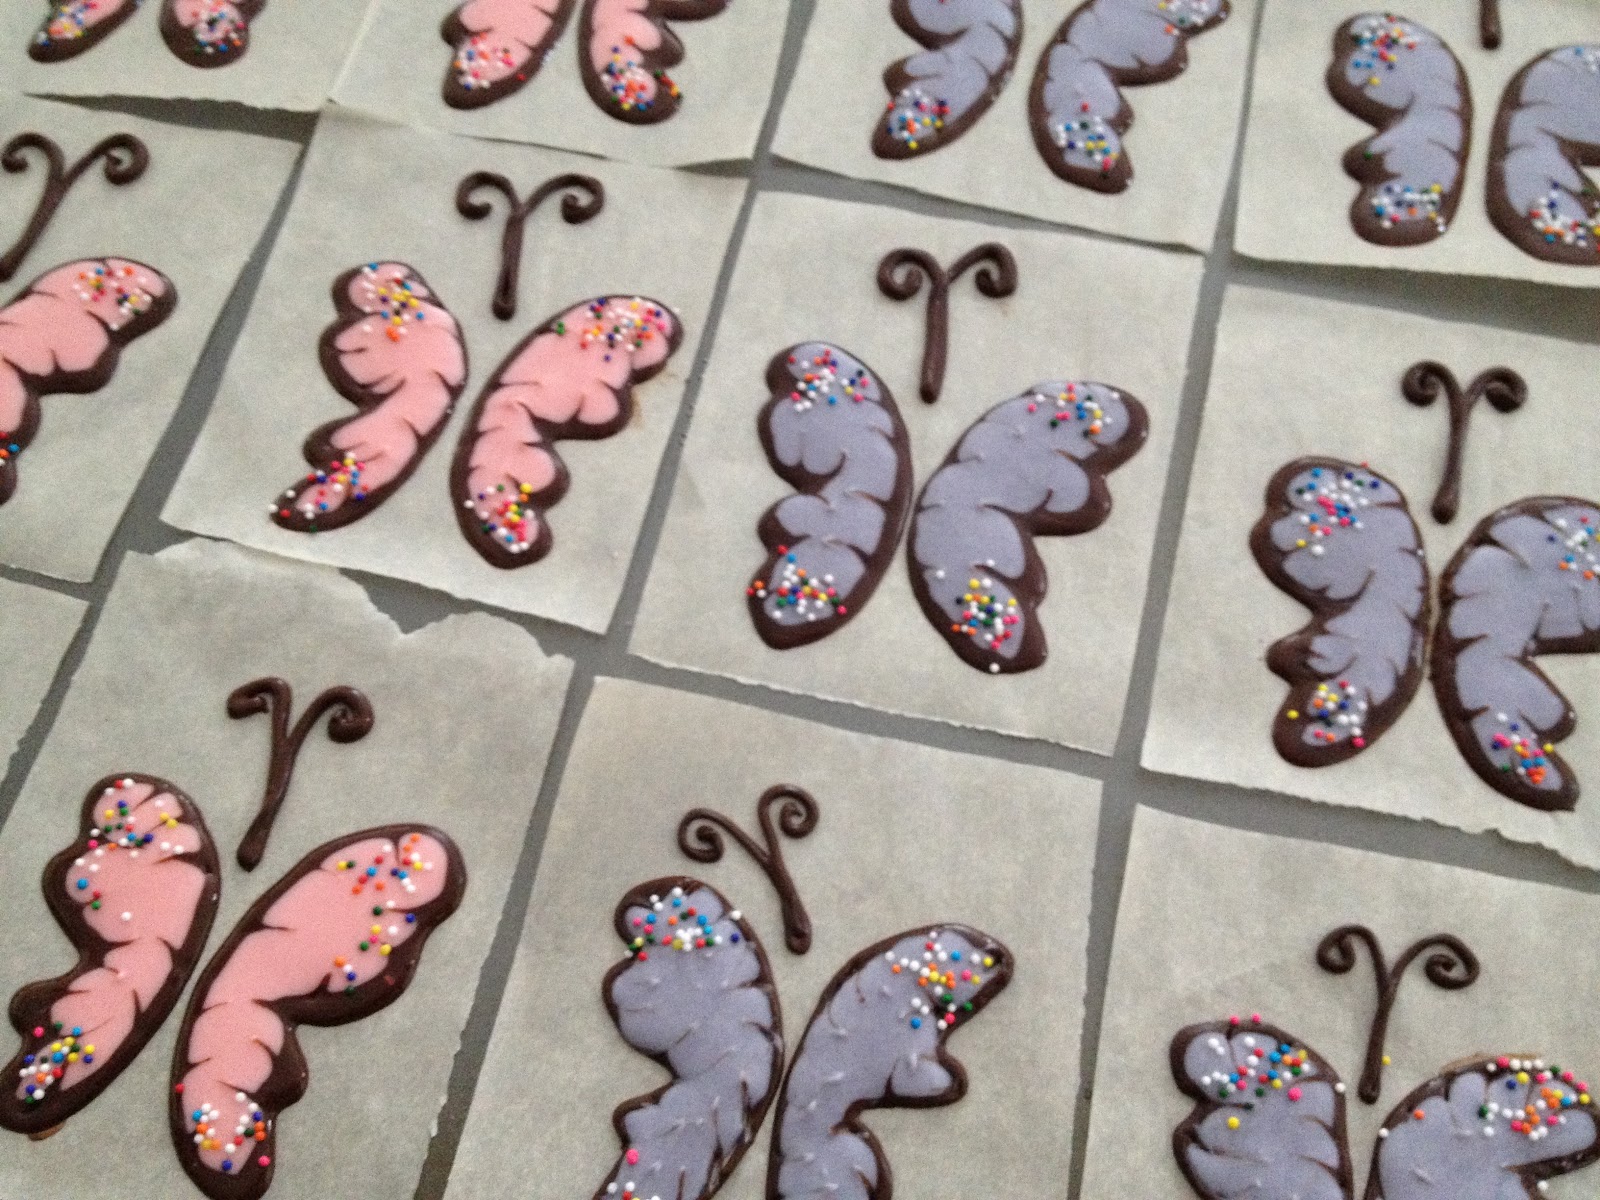
On a white clear paper, draw an outline of the butterfly wings you like.
Make sure that the size of these butterflies will fit well on your cake! ;)
Cut parchment paper in square shape, big enough to cover the outline you prepared.
If ready, then let's the fun part begin!

Place the square parchment paper over the outline paper.

Squeeze melted semi sweet (or dark) chocolate follow your outline.

Fill inside the outline (wing) with colored melted white chocolate.

Caution: this might get messy if slip :}
With your thump on the edge of the left side - your middle finger on the edge of the right side
move the paper quickly -- left & right -- until the filling smooth.
*Use wooden toothpick to help the filling touch the edge, if needed.

With a clean wooden toothpick, pose and drag the toothpick gently
beginning from the most outside line inward (let's say from brown to pink)
(only the surface, without touching the parchment on the bottom! please)
make a little curve as you go (see picture)
Then again, flatly shake -- left & right -- to smooth the surface.
Caution: you will have to clean the tip of toothpick (with tissue) for each line you made.
otherwise, color might get mix up.

Sprinkle dring .. dring .. ^_^ a little bit here .. a little bit there ..

Draw the antenna and voila! Done!
Voila!!
You can draw the body of the butterflies right now in between the wings
then let them dry all together.
Or you can draw it once the wings are dry .. on top of your cake.
Simply place one piece of chocolate chip on each side (one left - one right)
where you want the wings to be.. then place the wings on inner side
leaning on that piece of chocolate chip to create and angle wing
.. leaving small gap in between for the body ..
Squeeze enough melted chocolate to fill up the space between 2 wings.
Stick in the antenna. Done!
If you want to make the wings dry with angle shape (90 degree would be lovely)
Simply cut the box of aluminum foil roll, lengthwise, along the corner, in half
You will obtain 2 rails in V shape.
(or form 2 cardboard paper in V shape)
Gently place the parchment paper with 2 wings and antenna on this V shape rail.
Be careful with the antenna,
you might need to take it off the parchment paper first
then put in back on between the wings once you place the wings in V shape.
Squeeze enough melted chocolate to fill in between the gap of 2 wings.
Stick in the antenna. Done!
ENJOY!!! ^_^

wow! it sure is gorgeous! thanks for the idea
ReplyDelete