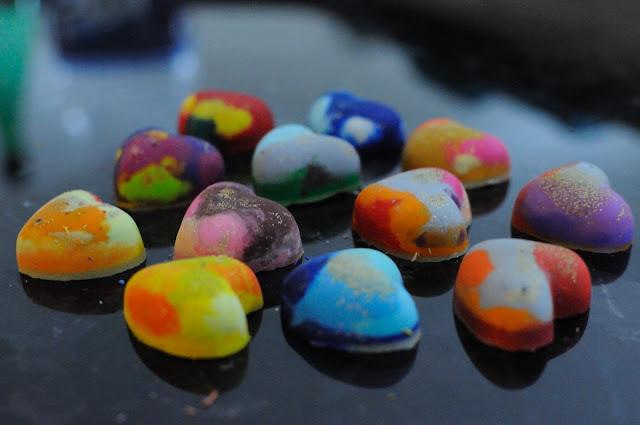
Being home with active kids is not easy. As a mom, we always need to find something to keep them busy. Sometime it's work well, sometime (often!) not. This project is one of "Sometime it's work well" :D It's so much fun. Kids can help almost in everysteps. Only "microwave" step that need parents or adult to help :) I love this activity as kids can help a lot and can decide on their own what color they like, what shape of the (new) crayon they want them to turn into. Most of all, They love their (new) crayon even more :)
To do this, we need some exercise .. parents (and yes, kids) will need to go search at every corners of the house: drawer, under table, on the carpet, in backpack, etc. Goal: try to collect as much as crayons as possible. The broken one are the best because it's just make your job quicker :)
Take off all paper cover, then cut/smash/break them into small pieces. Arrange them as you like (mixing colors or same shade of colors) in each cube of an ice tray .. Sprinkle a little bit of glitters on the bottoms, in between, and on top if you like .. yes, only for girl in this case :)
When ready, slowly move the tray onto flat dish before putting in the microwave, heat for a few minutes (depend on the power of the microwave). Keep an eye on the tray at all time as you heat because too hot/too long can melt the ice tray (depend on the power of the microwave - depend on the quality of an ice tray). Well, i did melted one of my ice tray! And i can tell you that cleaning up the melted plastic on counter top is VERY messy job! So, better avoid it if possible :}
As soon as it begin to melt, take the tray out and with a toothpick stir a little/gentle the pieces that doesn't well melted. Let's them cool down completely by set aside on the counter top or put it in the freeze until firm.
Once cooled completely, pop them out from ice tray by turning the tray up side down then gently push the bottom. Push push and push. IMPORTANT, during lift up the tray, look at your kid's face! Their smile will getting bigger and bigger :) please do not miss this moment. That's what this project for .. to see your kids smiles .. ^_^
Personal Useful Tips:
There are many methods to recycle the broken/forgotten crayons
- Ice tray - in microwave: This is the simplest and quickest method. The result look very nice as you can choose where you want the color to be. But risk in melting the tray if the heat is too long.
- Cake/cookie pan - in the oven: this is the same way than "ice tray - in microwave". The different is that you need tray/pan that oven-safe. Melt them in preheat oven at 250 F until all melted without bubbling. Again, this method give a very nice result as you can choose where you want the color to be. And no "pushing" as you can just tap the pan on the counter top. I personally don't choose this method as i don't like to mix crayon and food. But if you can just keep that tray just only for making crayon, that will be perfect.

- candy/chocolate mold - in double boil method: This method is good ONLY if you want to make the same color in a batch. If you melt many colors in the same batch, you will end up having the "brown" colors because all colors with mix up as you have to stir it during double boil. *Double boil method: Heat a few inch height of water in a small sauce pan. Put broken crayons inside heat-safe container (i use Jam container :)) then place inside saucepan with boiling water. Wait until melt then, with chopstick, stir a little bit the pieces that doesn't well melted. Immediately pour melted liquid into candy/chocolate mold. Let's cool completely before un-mold.
Yes, and now they will need some white paper to show how talented they are :) with help from new colorful crayons made by them. No need to change from one to another crayons anymore because all colors are already in one pieces :)
Have fun coloring!!


